How to create a photo/video studio at home?

Influencers, youtubers, podcasters… More and more of you are embarking on the adventure of digital media, and often start from your room at home, or your apartment! In this context, how to provide professional quality content to growing audiences of fans and followers? By following all our advice to create your own audiovisual studio!
5 easy-to-follow tips for setting up your home audiovisual studio
YouTube, Vimeo and Instagram have no secrets for you? Are you more Unsplash, Tumblr, SoundCloud or PodCloud? Short. Do you constantly create multimedia supports, and wish to professionalize your small domestic installation? Discover all our advice to make your home the next Abbey Road (or almost).
1. Find the right place: a space dedicated to your creations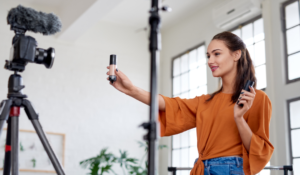
This is the first thing to define! Do you live in an 18 m² studio? The question does not arise: you will have to make do with the little space you have, and will probably have to coexist slightly with your equipment. Luckily, the latter sees its size becoming smaller and smaller, and some cables have given way to wireless… a real asset, when you lack space.
A choice and potential negotiations with your half should rather be necessary, if you have an extra bedroom, an unused garage or an available space in your living room! However, the decision should be quickly oriented, taking into account:
The area required (which varies, depending on whether you want to frame wide shots, general shots, American shots or chest shots…);
Storage space available;
The illumination of the area;
The color of the walls;
Want a specific color for one of your walls? Entrust the mission to a painter near you!
>> I need a pro. now !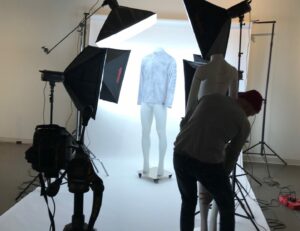
2. Bet a lot on the background: for the illusion of a real studio
At home, the possibilities are not the same as in a purpose-built room. Thus, there is a good chance that one of your walls will become the background that you will use to film yourself, or to photograph your models. Then avoid the colored wall, which, far from being neutral, risks seriously disturbing your calibrations, and could even be reflected during the shots; prefer a white or gray wall instead.
Do you have a slightly larger envelope? You should also know that there are other methods to take advantage of a semi-professional background:
The background in paper or special photo fabric, to be fixed on tripod supports;
The bottom in stretch fabric, with telescopic support;
The folding backdrop, to be placed against a wall;
The softbox, for product photography…
To go further, and depending on the needs, you may also need an overlay background, in order to add an image or a video, in the background. Also called “chroma”, this background can be green or blue; two colors far from the natural pigmentation of the skin.
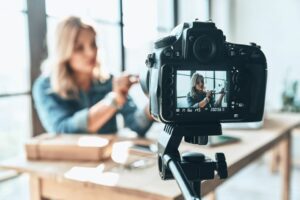
YouTuber’s video studio
You have to think about the form… and the content!
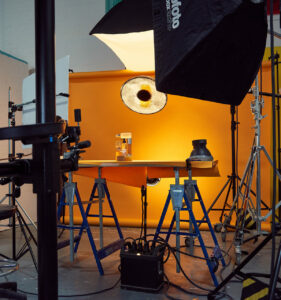
3. Do not neglect the lighting: the beginning of a successful YouTube or Instagram image
Lighting control is crucial, and there are always ways to work wonders, even in spaces that aren’t necessarily dedicated photo or video studios.
The main idea ? Minimize unsightly shadows. To do this, make sure that at least two identical light sources sprinkle your shooting space, in a diffuse way, and control the light using a diffuser and a reflector.
Also, make sure that:
The background is evenly lit, but slightly underexposed in relation to the subject (you, your model, your object…);
Any reflections are controlled, with a backlit light source;
>> Panels or LED torches, flashes, umbrellas, classic bulbs… The choice is yours!
Finally, the use of light sources from outside depends on your discipline and your artistic research. Taking pictures near a window allows you to take advantage of natural light, which is sometimes sought after in photography; in case of too much light, a curtain or a white sheet can help diffuse it.
4. Give yourself the means for beautiful shots: the 🧡 of your project
The image must be at the heart of your concerns! Today, filming with a smartphone or a tablet makes it possible to obtain very good initial results. However, nothing replaces SLRs (DSLR), camcorders and professional cameras. It’s up to you to choose according to your discipline, your budget, the expectations of your audience and your field of activity.
Either way, you’ll need a tripod, GorillaPod, remote-control electronic stabilizer, or selfie stick to support your device…unless you specifically want adopt the “smartphone” style, very typical Vlog.
On the editing side, there are a plethora of solutions, from the mobile application directly integrated into the smartphone, to another free one, through the professional editing software for creating special effects. In this area, it is often the technical skills and the time available that decide.
YouTuber filming at home with an iPhone
Everything is there for successful videos!
5. Think about sound quality: the Hi-Fi “finish” that hits the mark
For this fifth point, it is not a question, reassure yourself, not of creating the conditions worthy of a professional recording studio, but rather those to achieve a suitable sound recording to accompany your video recordings, your streams or screencasts . And it’s a safe bet that you will only have “voice” to record at home, greatly reducing the implementation constraints of your home studio.
In apartments, the sounds that disturb the recordings come mainly from outside traffic, but also from human traffic in the building or in adjacent rooms. They can also come from sanitary facilities, household appliances, or ventilation equipment, for example.
Not to mention carrying out an in-depth acoustic treatment, identify these sources of nuisance, and isolate your creative space. Sheets of sound insulation (acoustic foam) are particularly affordable and easy to install. On another note, carpeting and rugs add thickness to floors, while reducing reverberation.
>> You will like to read – Sound insulation: how to soundproof an apartment?
As for sound equipment, get at least:
A set of cardioid and omnidirectional microphones (lavalier, shotgun…);
Bonnets;
An interface (sound card);
A portable recorder, Zoom or Tascam type;
A headset;
Monitoring speakers;
MAO software and a DAW…
🎤 Emblematic of radio studios, and adopted by many podcasters, the Shure SM7B cardioid dynamic microphone is ideal for voice!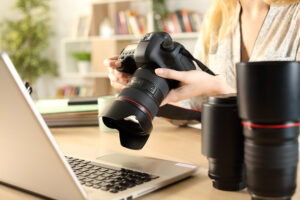
These few best practices should help you create a comfortable space to work in, guaranteeing good conditions for your exports. Be aware, however, that setting up an audiovisual studio worthy of the name cannot be improvised, and requires a lot of investment! A time-cost-benefit calculation to possibly consider, if your creations provide you with sufficient income!
Do you have a good plan, a “gear” idea or one of your creations to share 😉? Leave us a comment !
![]()